It seems that chinese digisparks dont have the reset fuse disabled. So i started searching a way to set the fuses right. This is what i got:
First we need to install arduino ISP, on an arduino uno, or similar. You can get Arduino ISP on examples

Arduino ISP program
Now you will need to conect the arduino to the digispark, with this configuration:
GND-->GND
5v-->5v
10-->p5
11-->p0
12-->p1
13-->p2
And you will need to connect a 10uF capacitor to the reset of an arduino and to ground
Next step is to install AVRDUDESS.
Now you have to open it and set everything as it is on the image below

AVRDUDESS
Now you have to press first "Detect" and if it recognises the attiny85, then you have to press in the box of "Fuses & lock bits"the first Read. You will get 3 hexadecimal values.

Then you have to take this values and put them in this Calculator. Put attiny85 as AVR, and put the values in their places
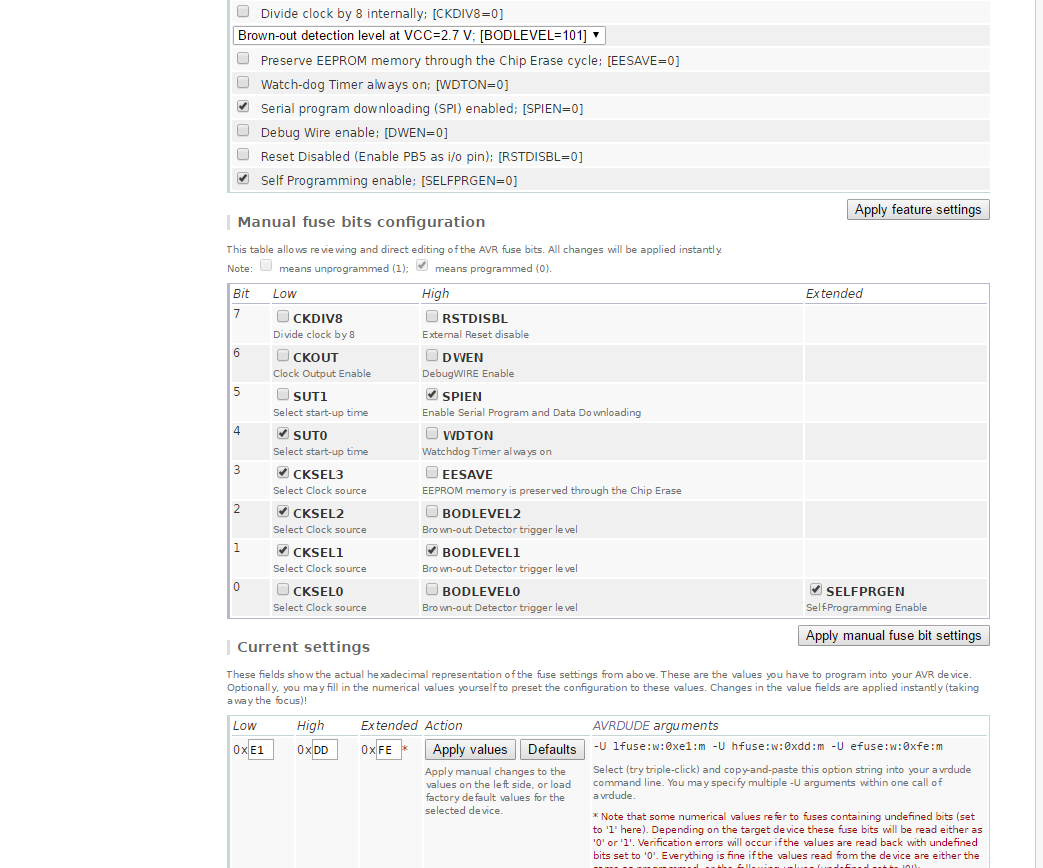
Later you have to press the bit 7 RSTDISBL, and put it to high, and recalculate.

Thank you so much for this easy tutorial, it worked for me!
ResponderEliminarI've been searching for a solution for hours before I finally found this